二、Webpack打包
December 19, 2024 (1y ago)
本章节所有的代码demo都在 gitee拉钩教育文件夹中可以找到
[2021060620210606] 开始构建20210626] 学习
[20210607
模块打包工具的由来
es module下还是存在兼容问题,我们模块化之后,这些零散的模块文件,太多了造成浏览器的频繁请求,再者就是html和其他的资源文件也需要模块化,如何做呢?
这里有一个工具就是一个webpack,它既可以 自动的编译代码,又可以把这些散落的文件打包到一起以减少网络的对模块文件的请求,而且还可以支持其他资源模块的打包
模块打包工具概要
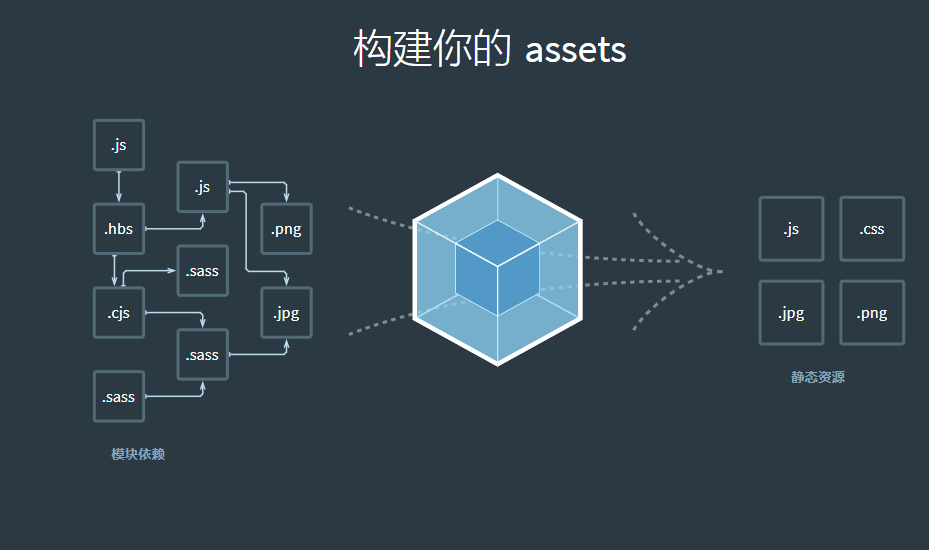
webpack是一个模块打包器!,在使用的时候通过模块加载器loader,代码拆分code splitting ,资源模块化 Aseet Module 来配合使用 ,这里的模块化 是整个前端项目的模块化,并非指单一的js模块化
webpack快熟上手
这里我们创建一个小demo用于演示webpack的使用
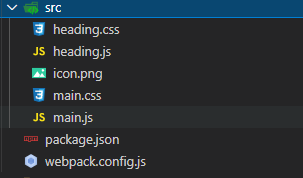
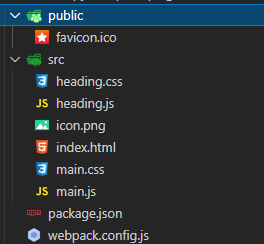
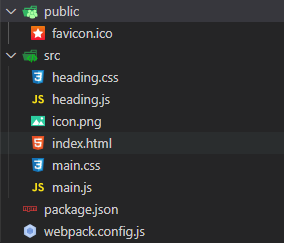
首先是项目文件夹结构
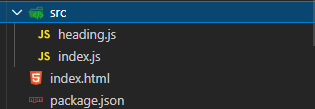
然后是我们的文件
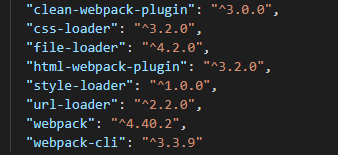
"scripts": {
"build": "webpack" // 指定脚本
},
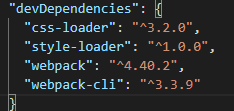
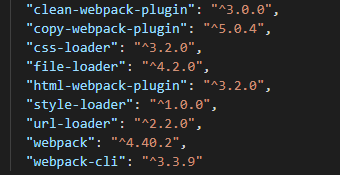
"devDependencies": {
"webpack": "^4.40.2", // 依赖项
"webpack-cli": "^3.3.9"
}
src/heading
export default () => {
  const element = document.createElement('h2')

  element.textContent = 'Hello world'
  element.addEventListener('click', () => {
    alert('Hello webpack')
  })

  return element
}
src/index
import createHeading from './heading.js'

const heading = createHeading()

document.body.append(heading)
index.html
<!DOCTYPE html>
<html lang="en">
<head>
  <meta charset="UTF-8">
  <meta name="viewport" content="width=device-width, initial-scale=1.0">
  <meta http-equiv="X-UA-Compatible" content="ie=edge">
  <title>Webpack - 快速上手</title>
</head>
<body>
  //  <script type="module" src="/content/books/%E6%8B%89%E9%92%A9%E6%95%99%E8%82%B2%E5%A4%A7%E5%89%8D%E7%AB%AF/%E4%BA%8C%E3%80%81Webpack%E6%89%93%E5%8C%85/Resource/src/index.js"></script>
  <script src="dist/main.js"></script>  // 打包好之后就不在需要 type="module"了
</body>
</html>
dist

webpack配置文件
我们先来看看本节课的目标
- [ ] 完成一个webpack配置文件,
- [ ] 实现文件的输出目录 和输出名称的修改
让我们看看目录结构
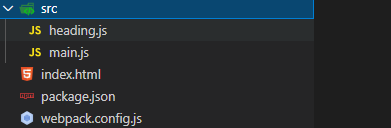
内部的内容和上一讲是一样的,只不过名字变了而已,接下来我们需要重点分析的是webpack.config.js
const path = require('path')   // webpacK是直接运行在node环境下的 我们直接使用commonjs就好了

module.exports = {
  entry: './src/main.js',   // 输出路径 可以是相对的
  output: {
    filename: 'bundle.js', // 输出文件的名称
    path: path.join(__dirname, 'output')  // 必须是绝对的
  }
}
webpack工作模式
工作模式指的是webpack 4.x以后的版本中有一个mode的配置项在config.js中,用来指定运行时的工作模式,主要用途就是用来提升打包的速度 和区分不同的场景,比如是在product 还是development 或者是 原始的构建工作模式, 每种工作模式下,打包出来的产物是不一样的
const path = require('path')

module.exports = {
  // 这个属性有三种取值,分别是 production、development 和 none。
  // 1. 生产模式下,Webpack 会自动优化打包结果;
  // 2. 开发模式下,Webpack 会自动优化打包速度,添加一些调试过程中的辅助;
  // 3. None 模式下,Webpack 就是运行最原始的打包,不做任何额外处理;
  mode: 'development',
  entry: './src/main.js',
  output: {
    filename: 'bundle.js',
    path: path.join(__dirname, 'dist')
  }
}
webpack打包结果和运行原理
这里的原理指的是,通过分析 webpack 在默认模式下(mode="none")打包出来的代码是怎么样的,他们如何在运行,并在浏览器中去调试他们
在这里老李就不做过多的介绍了,详细的你可以在浏览器中去做断点调试
webpack资源模块的加载
webpack不仅仅是js的打包工具,它是整个前段项目的打包构建工具,因此我们不仅仅可以打包js它可以打包所有的前端资源,如源代码,静态资源等
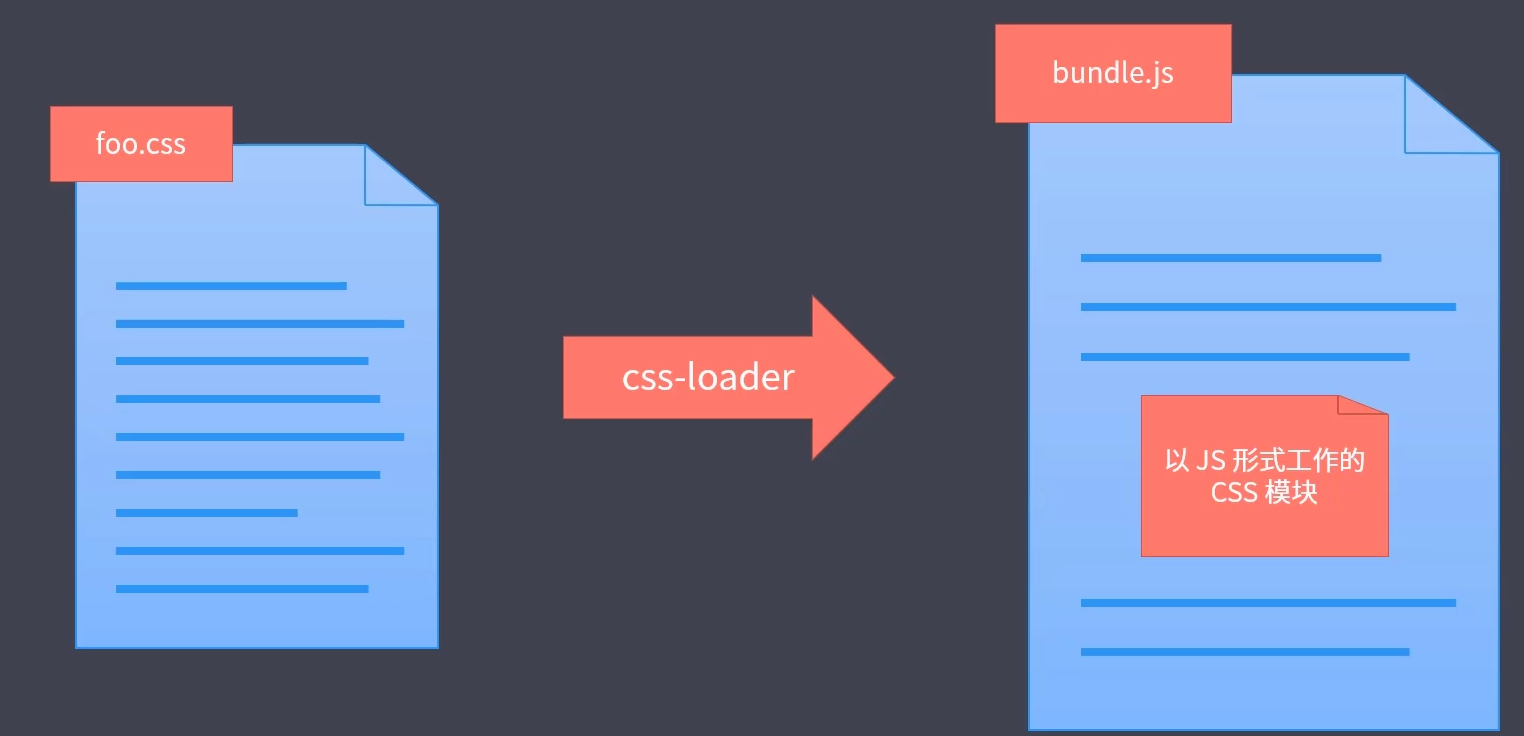
那么如何去加载这里静态文件和其他js之外的内容呢?**很简单就是使用loader,各种loadeer。**这里以css为例子,
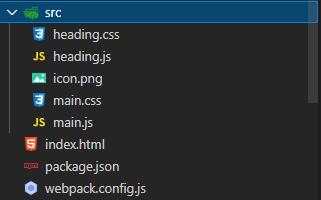
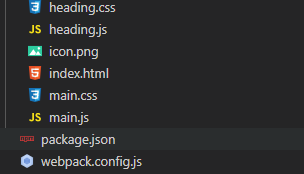
第一步:准备好所有的源代码文件
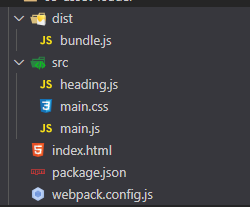 其中dist是不存在的。这里请忽略它。
index.html
<!DOCTYPE html>
<html lang="en">
<head>
  <meta charset="UTF-8">
  <meta name="viewport" content="width=device-width, initial-scale=1.0">
  <meta http-equiv="X-UA-Compatible" content="ie=edge">
  <title>Webpack - 资源模块加载</title>
</head>
<body>
  <script src="dist/bundle.js"></script>
</body>
</html>
mian.js heading.js mian.css
import createHeading from './heading.js'

const heading = createHeading()

document.body.append(heading)


// handing.js
export default () => {
  const element = document.createElement('h2')

  element.textContent = 'Hello world'
  element.addEventListener('click', () => {
    alert('Hello webpack')
  })

  return element
}

// main.css
body {
  margin: 0 auto;
  padding: 0 20px;
  max-width: 800px;
  background: #f4f8fb;
}
第二步:安装模块配置webpack
webpack的配置如下,需要提醒的一点是,loader是从后往前执行的
const path = require('path')

module.exports = {
  mode: 'none',
  entry: './src/main.css',
  output: {
    filename: 'bundle.js',
    path: path.join(__dirname, 'dist')
  },
  module: {
    rules: [
      {
        test: /.css$/,
        use: [
          'style-loader',  // 后使用
          'css-loader'  // 先加载
        ]
      }
    ]
  }
}
第三步:测试
yarn build
# 这里的yarn build 指向的地方是 json里的 webpack 命令"scripts": {
"build": "webpack"
},总结:使用loader,各种loadeer可以用来处理在打包过程中的任务和需求
导入资源模块
纠正一点就是,我们一般都是通过一个js文件为入口,从这个入口出发去webpack会去找他需要的文件
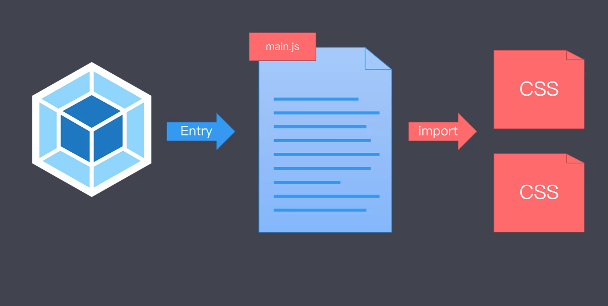
建立js和其它资源文件的联系。因此在上一个小节中这样的写入代码也是可以的
src下新增一个css heading.css,在hading.js中引入
import './heading.css'
export default () => {
const element = document.createElement('h2')
element.textContent = 'Hello world'
element.classList.add('heading') // 添加一个类名!也是正常生效的
element.addEventListener('click', () => {
alert('Hello webpack')
})
return element
}
这里还有一个观点:学习一个新事物并不是学习它的所有用法就能提高,而是要学习它的思想搞明白为什么这么设计才是最重要的
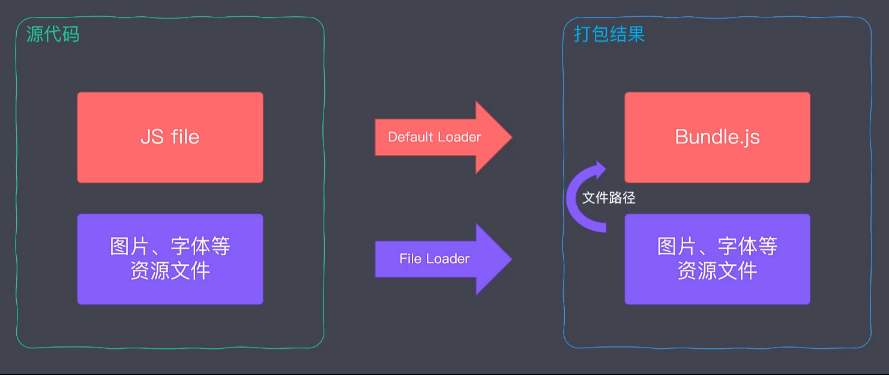
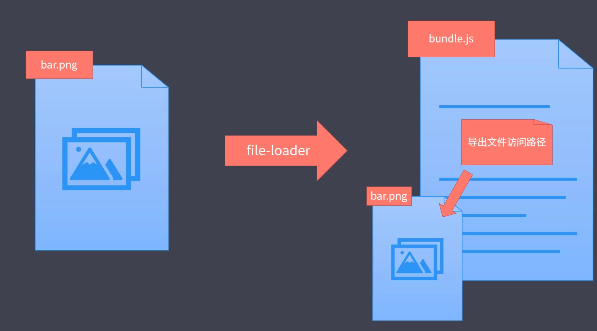
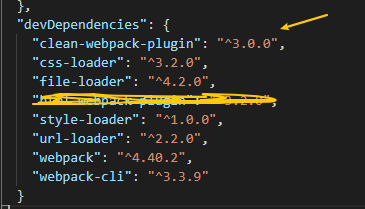
文件加载器file-loader
基本上webpack社区有很多的loader,可以实现各种奇葩需求,但这里需要说一点就是如果你用到了**文件资源加载器loader**,这个比较特殊,它主要的方式就是cp了一份文件到dist目录下而已
第一步 整体文件夹结构
第二步 webpack配置
yarn add file-loader第三部 : 运行和测试 yarn webpack就好了
const path = require('path')
module.exports = {
mode: 'none',
entry: './src/main.js',
output: {
filename: 'bundle.js',
path: path.join(__dirname, 'dist'),
publicPath: 'dist/'
},
module: {
rules: [
{
test: /.css$/,
use: [
'style-loader',
'css-loader'
]
},
{
test: /.png$/,
use: 'file-loader' // 就是这个家伙
}
]
}
}
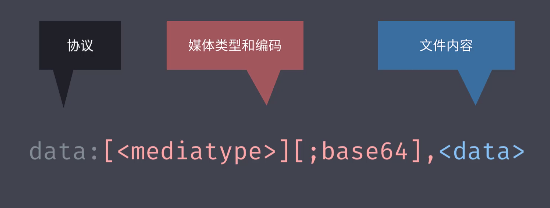
URL加载器
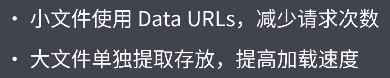
上述的文件仅仅是简单的拷贝和重命名文件,这里的URL指的是可以把一些文件转化为数据,直接丢在代码里,可以大幅度的提升app性能和构建速度,data-rul就是一个可以标识文件的内容格式
第一步:文件结构
第二步:webpack配置
const path = require('path')
module.exports = {
mode: 'none',
entry: './src/main.js',
output: {
filename: 'bundle.js',
path: path.join(__dirname, 'dist'),
publicPath: 'dist/'
},
module: {
rules: [
{
test: /.css$/,
use: [
'style-loader',
'css-loader'
]
},
{
test: /.png$/,
use: {
loader: 'url-loader',
options: {
limit: 10 * 1024 // 10 KB
}
}
}
]
}
}
第三部:运行
yarn weboack 适合什么时候使用呢?
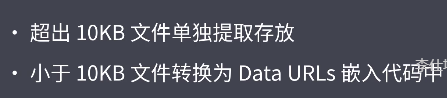
注意:使用data-url需要配合file-loader使用,如果data-url不处理,就会调用file-loader
其他常用的加载器
我们现在做一个分类:
编译转换类型的loader:
文件操作类型
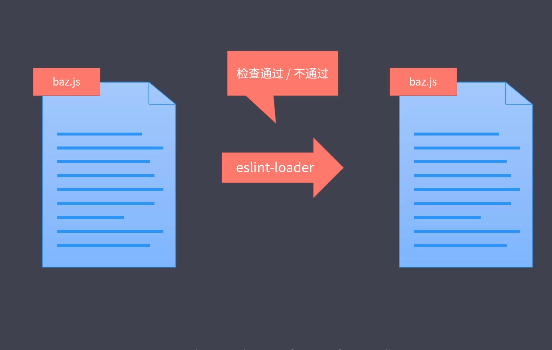
代码质量lint加载器
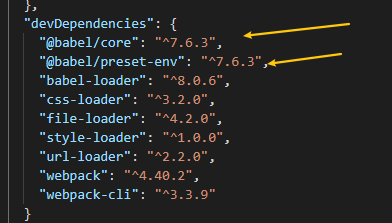
webpack与es5
webpack 可以自带的编译import export 因为。webpack的运行本身就需要实现模块化规范。但es6在webpack 中并不是自带的哈。如果你需要编译es6
第一步:代码结构
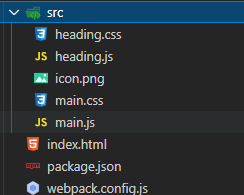
第二步:webpack
const path = require('path')
module.exports = {
mode: 'none',
entry: './src/main.js',
output: {
filename: 'bundle.js',
path: path.join(__dirname, 'dist'),
publicPath: 'dist/'
},
module: {
rules: [
{
test: /.js$/,
use: {
loader: 'babel-loader', // 载入babel平台
options: {
presets: ['@babel/preset-env'] // 载入对饮的插件提供给babel平台进行转换,这里的
"@babel/preset-env" 就是一个es6转换的插件
}
}
},
{
test: /.css$/,
use: [
'style-loader',
'css-loader'
]
},
{
test: /.png$/,
use: {
loader: 'url-loader',
options: {
limit: 10 * 1024 // 10 KB
}
}
}
]
}
}
第三部:运行
yarn webpack加载资源的方式
webpack的载入的方式
- import 声明
- commonjs下的require需要加一个.default去获取结果
require('../xxx/xxx.js').default- AMD规范也是可以的,这里不多展开了
- Css-loader也可以@import等
- Src在html中的使用,也会触发webpack的资源加载
- a标签的href属性需要注意:HTML-loader默认只支持 src属性
const path = require('path')
module.exports = {
mode: 'none',
entry: './src/main.js',
output: {
filename: 'bundle.js',
path: path.join(__dirname, 'dist'),
publicPath: 'dist/'
},
module: {
rules: [
{
test: /.js$/,
use: {
loader: 'babel-loader',
options: {
presets: ['@babel/preset-env']
}
}
},
{
test: /.css$/,
use: [
'style-loader',
'css-loader'
]
},
{
test: /.png$/,
use: {
loader: 'url-loader',
options: {
limit: 10 * 1024 // 10 KB
}
}
},
{
test: /.html$/,
use: {
loader: 'html-loader',
options: {
attrs: ['img:src', 'a:href'] // 就是这个一坨
}
}
}
]
}
}
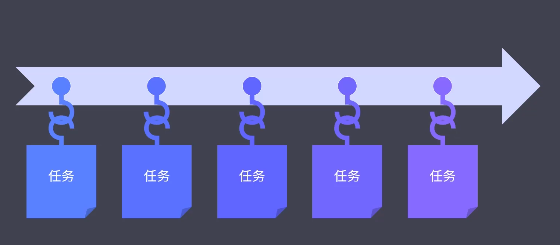
核心工作原理
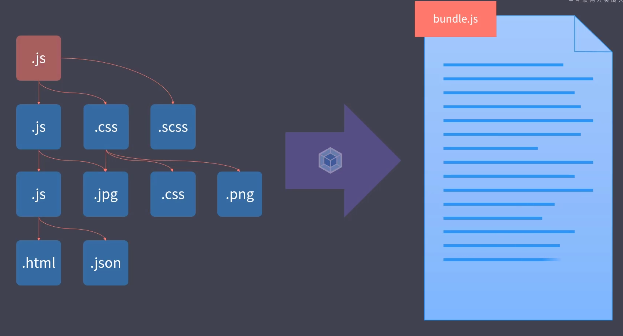
主要的核心就是由一个入口,根据这个入口去递归你的文件依赖关系构成你一颗依赖树,根据这颗树把其节点依赖文件,找到并发到对饮的配置项的加载器中loader,然后一起输出成一个buldejs
loader机制是webpack的核心
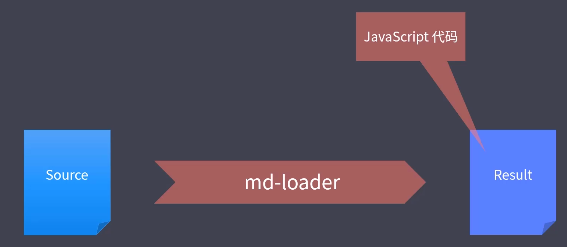
开发一个loader
loader就是一个函数,收入就是加载到的资源,输出就是处理后的文件,注意他需要输出一个js代码/string且符合js语法的string,或者他的下一个loader 管道可以接收 不是js的东西,交给其他loader
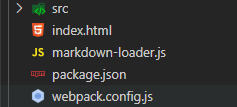
第一步:文件夹结构
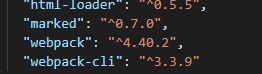
第二步:加载依赖
第三部:编写loader
markdown-loader.js
const marked = require('marked')
module.exports = source => {
// console.log(source)
// return 'console.log("hello ~")'
const html = marked(source) // 这个lib可以直接处理 md的语法到成HTML
// return html
// return `module.exports = "${html}"`
// return `export default ${JSON.stringify(html)}`
// 返回 html 字符串交给下一个 loader 处理
return html
}
对于loader的输出有两种方式一个你JSON转一下你的输出结果,一个呢不直接输出而是把结果交给其他loader去处理
- 直接处理
++++
return `export default ${JSON.stringify(html)}`
++++- 放回一个html,交给html-loader去处理
return html最后,别忘记了我们需要配置webpack.config才行哦
const path = require('path')
module.exports = {
mode: 'none',
entry: './src/main.js',
output: {
filename: 'bundle.js',
path: path.join(__dirname, 'dist'),
publicPath: 'dist/'
},
module: {
rules: [
{
test: /.md$/,
use: [
'html-loader',
'./markdown-loader' // 现在是第二钟输出资源方式
]
}
]
}
}
插件机制的介绍
插件webpack另一个核心,Plugin是增强自动化,loader是处理资源加载过程中的事务
自动清除输出目录插件
我们看看如何使用吧,很简单
第一步:看看目录结果
第二步:配置webpack
const path = require('path')
const webpack = require('webpack')
const { CleanWebpackPlugin } = require('clean-webpack-plugin')
module.exports = {
mode: 'none',
entry: './src/main.js',
output: {
filename: 'bundle.js',
path: path.join(__dirname, 'dist'),
publicPath: 'dist/'
},
module: {
rules: [
{
test: /.css$/,
use: [
'style-loader',
'css-loader'
]
},
{
test: /.png$/,
use: {
loader: 'url-loader',
options: {
limit: 10 * 1024 // 10 KB
}
}
}
]
},
plugins: [
new CleanWebpackPlugin(),
]
}
第三步:试试看
yarn webpack自动生成HTML插件
这个插件主要的工作就是:把html也自动编译和资源打包的bundle文件动态的注入到html中并在最后打包完成后自动输出到dist下
第一步:文件夹结构
关键文件
<!DOCTYPE html>
<html lang="en">
<head>
<meta charset="UTF-8">
<meta name="viewport" content="width=device-width, initial-scale=1.0">
<meta http-equiv="X-UA-Compatible" content="ie=edge">
<title>Webpack</title>
</head>
<body>
<div class="container">
<h1><%= htmlWebpackPlugin.options.title %></h1>
</div>
</body>
</html>
第二步:配置webpack
const path = require('path')
const { CleanWebpackPlugin } = require('clean-webpack-plugin')
const HtmlWebpackPlugin = require('html-webpack-plugin')
module.exports = {
mode: 'none',
entry: './src/main.js',
output: {
filename: 'bundle.js',
path: path.join(__dirname, 'dist'),
// publicPath: 'dist/'
},
module: {
rules: [
{
test: /.css$/,
use: [
'style-loader',
'css-loader'
]
},
{
test: /.png$/,
use: {
loader: 'url-loader',
options: {
limit: 10 * 1024 // 10 KB
}
}
}
]
},
plugins: [
new CleanWebpackPlugin(),
// 用于生成 index.html
new HtmlWebpackPlugin({
title: 'Webpack Plugin Sample',
meta: {
viewport: 'width=device-width'
},
template: './src/index.html'
}),
// 用于生成 about.html // 多页面应用需要生成多个页面
new HtmlWebpackPlugin({
filename: 'about.html'
})
]
}
第三步:运行yarn build
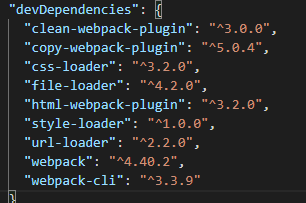
对于静态文件的处理
这里我们需要使用另一个plugin,copy-webpack-plugin
第一步:文件夹的结构
第二步:webpack的配置
const path = require('path')
const { CleanWebpackPlugin } = require('clean-webpack-plugin')
const HtmlWebpackPlugin = require('html-webpack-plugin')
const CopyWebpackPlugin = require('copy-webpack-plugin')
module.exports = {
mode: 'none',
entry: './src/main.js',
output: {
filename: 'bundle.js',
path: path.join(__dirname, 'dist'),
// publicPath: 'dist/'
},
module: {
rules: [
{
test: /.css$/,
use: [
'style-loader',
'css-loader'
]
},
{
test: /.png$/,
use: {
loader: 'url-loader',
options: {
limit: 10 * 1024 // 10 KB
}
}
}
]
},
plugins: [
new CleanWebpackPlugin(),
// 用于生成 index.html
new HtmlWebpackPlugin({
title: 'Webpack Plugin Sample',
meta: {
viewport: 'width=device-width'
},
template: './src/index.html'
}),
// 用于生成 about.html
new HtmlWebpackPlugin({
filename: 'about.html'
}),
new CopyWebpackPlugin([
// 'public/**'
'public'
])
]
}
第三步:yarn build
至此为止我们已经可以整各种webpack插件了,社区和GitHub上还有更多好玩有趣,又奇葩的插件,如果你有需求可以提炼关键期去GitHub搜
自己写一个plugin
相对于loader只是在资源加载的时候工作,plugin的能力更加的广,它的核心原理就是hooks,在webpack的构建流程下,都会提供一些钩子给你用
那么到底有哪儿些钩子呢?你可以去官方文档看看哈
在自己写plugin的时候有如下的要求:得是一个实例,需要实现一个特殊的方法。以下面的myplugin为例,我们看看如何自定义一个plugin,它的功能是:清除一些特定规则的注释
第一步:文件夹的结构
第二步:自定义plugin到底如何写?
const path = require('path')
// 我们自定义的plugin目标就是清除一些注释
class MyPlugin { // 就是这样写的!
apply (compiler) { // 这个是webpack的要求,需要写的一个方法
console.log('MyPlugin 启动')
compiler.hooks.emit.tap('MyPlugin', compilation => {
// compilation => 可以理解为此次打包的上下文
for (const name in compilation.assets) {
// console.log(name)
// console.log(compilation.assets[name].source())
if (name.endsWith('.js')) {
const contents = compilation.assets[name].source()
const withoutComments = contents.replace(/\/\*\*+\*\//g, '')
compilation.assets[name] = {
source: () => withoutComments,
size: () => withoutComments.length
}
}
}
})
}
}
module.exports = {
mode: 'none',
entry: './src/main.js',
output: {
filename: 'bundle.js',
path: path.join(__dirname, 'dist'),
// publicPath: 'dist/'
},
module: {
rules: [
++++
]
},
plugins: [
++++
new MyPlugin()
]
}
第三步:yarn buidl
开发体验优化
自动刷新
proxy代理
调试sourceMap
HMR
HMR实际上是解决了项目在自动刷新之后,由于页面的状态没有保存,导致的整体全部刷新,这个是不符合我们的直觉,和编码操作的。 因此我们需要使用这个HMR ,模块热替换,的方式来实现我们这样的一个述求
“能够及时的响应我们的源代码和资源文件的变化自动刷新浏览器,使得效果实时可见,但是又不是整体刷新不保留状态”
开启
热更新把这个东西HMR是集成在webpack-dev-server中,开启它有两种方式
【配置方式】
只需要在webpack.config.js
const webpack = require('webpack')
const HtmlWebpackPlugin = require('html-webpack-plugin')
module.exports = {
mode: 'development',
entry: './src/main.js',
output: {
filename: 'js/bundle.js'
},
devtool: 'source-map',
devServer: {
hot: true
// hotOnly: true // 只使用 HMR,不会 fallback 到 live reloading
},
module: {
rules: [
{
test: /\.css$/,
use: [
'style-loader',
'css-loader'
]
},
{
test: /\.(png|jpe?g|gif)$/,
use: 'file-loader'
}
]
},
plugins: [
new HtmlWebpackPlugin({
title: 'Webpack Tutorial',
template: './src/index.html'
}),
new webpack.HotModuleReplacementPlugin()
]
}
接着去运行它就好了
yarn webpack-dev-server --open提问
但是我们发现还是存在问题的哈,原因是HMR不是开箱即用的,针对css模块来说,它是经过loader 处理的 直接自动处理的,更新之后直接可以以script的方式加入到热更新代码中去,
但是js脚本是不能直接更新处理的,因为js的几乎是没有任何规则,任何的js模块的导出都是不确定的,而在那些前端框架中是实现了HMR的js更新自动处理,因为他们有自己的规则
它的Api
hot属性是HMR的核心对象.由于我们自己处理 热替换
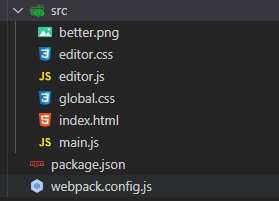
一、项目的结构

二、热更新代码如何写?
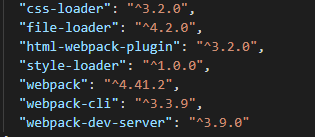
先给我们配置webpack.config.js
const webpack = require('webpack')
const HtmlWebpackPlugin = require('html-webpack-plugin')
module.exports = {
mode: 'development',
entry: './src/main.js',
output: {
filename: 'js/bundle.js'
},
devtool: 'source-map',
devServer: {
hot: true
// hotOnly: true // 只使用 HMR,不会 fallback 到 live reloading,意思就是不会自动刷新
},
module: {
rules: [
{
test: /\.css$/,
use: [
'style-loader',
'css-loader'
]
},
{
test: /\.(png|jpe?g|gif)$/,
use: 'file-loader'
}
]
},
plugins: [
new HtmlWebpackPlugin({
title: 'Webpack Tutorial',
template: './src/index.html'
}),
new webpack.HotModuleReplacementPlugin()
]
}
在代码需要被引入的时候,处理热替换
main.js
import createEditor from './editor'
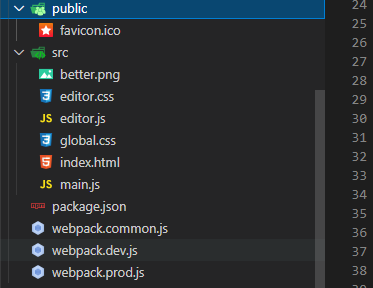
import background from './better.png'
import './global.css'
const editor = createEditor()
document.body.appendChild(editor)
const img = new Image()
img.src = background
document.body.appendChild(img)
// ============ 以下用于处理 HMR,与业务代码无关 ============
// console.log(createEditor)
if (module.hot) { // 这个逻辑比较简单,主要避免报错
let lastEditor = editor
module.hot.accept('./editor', () => {
// console.log('editor 模块更新了,需要这里手动处理热替换逻辑')
// console.log(createEditor)
const value = lastEditor.innerHTML
document.body.removeChild(lastEditor)
const newEditor = createEditor()
newEditor.innerHTML = value
document.body.appendChild(newEditor)
lastEditor = newEditor
})
}
三、规则
只要模块改变了,这个函数就会自动去执行,如果我们没有处理热跟新 HMR会自动热更新
处理图片热替换
图片热替换比较简单,在模块引入中使用的使用就好了
module.hot.accept('./better.png', () => {
img.src = background
console.log(background)
})生产环境下的优化
前面我们都是在优化dev环境下的操作,但是在代码中注入了很多生成环境下不需要的代码,为此webpack4有一个model的属性,用来配置webpack在不同环境下的行为。在不同环境下,我们可以减去或者新增一些配置来优化不同环境需要适用的场景配置
不同环境下的配置
方式1
这种方式,主要就是在webpackConfig中直接判断,然后通过命令行运行时携带的参数来控制不同的环境
const webpack = require('webpack')
const { CleanWebpackPlugin } = require('clean-webpack-plugin')
const HtmlWebpackPlugin = require('html-webpack-plugin')
const CopyWebpackPlugin = require('copy-webpack-plugin')
module.exports = (env, argv) => {
const config = {
mode: 'development',
entry: './src/main.js',
output: {
filename: 'js/bundle.js'
},
devtool: 'cheap-eval-module-source-map',
devServer: {
hot: true,
contentBase: 'public'
},
module: {
rules: [
{
test: /\.css$/,
use: [
'style-loader',
'css-loader'
]
},
{
test: /\.(png|jpe?g|gif)$/,
use: {
loader: 'file-loader',
options: {
outputPath: 'img',
name: '[name].[ext]'
}
}
}
]
},
plugins: [
new HtmlWebpackPlugin({
title: 'Webpack Tutorial',
template: './src/index.html'
}),
new webpack.HotModuleReplacementPlugin()
]
}
if (env === 'production') {
config.mode = 'production'
config.devtool = false
config.plugins = [
...config.plugins,
new CleanWebpackPlugin(),
new CopyWebpackPlugin(['public'])
]
}
return config
}
yarn webpack # 默认配置
yarn webpack --env production # 使用production配置方式2
最常用就是,分别使用不容的配置文件来标识 ,模块化webpack的模块,
说明 merge的webpack用来进行深merge对象的方法,loadsh中也有对应的方法,这里我们使用webpack的merge
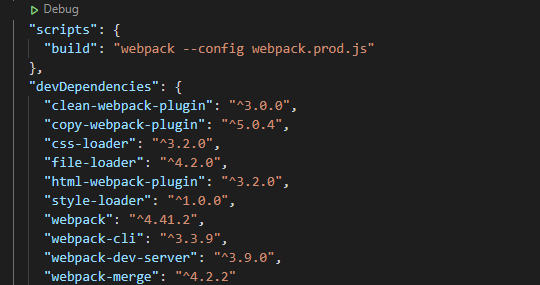
这三个文件的内容是
# commonjs
const HtmlWebpackPlugin = require('html-webpack-plugin')
module.exports = {
entry: './src/main.js',
output: {
filename: 'js/bundle.js'
},
module: {
rules: [
{
test: /\.css$/,
use: [
'style-loader',
'css-loader'
]
},
{
test: /\.(png|jpe?g|gif)$/,
use: {
loader: 'file-loader',
options: {
outputPath: 'img',
name: '[name].[ext]'
}
}
}
]
},
plugins: [
new HtmlWebpackPlugin({
title: 'Webpack Tutorial',
template: './src/index.html'
})
]
}
# dev.js
const webpack = require('webpack')
const merge = require('webpack-merge')
const common = require('./webpack.common')
module.exports = merge(common, {
mode: 'development',
devtool: 'cheap-eval-module-source-map',
devServer: {
hot: true,
contentBase: 'public'
},
plugins: [
new webpack.HotModuleReplacementPlugin()
]
})
# prod.js
const merge = require('webpack-merge')
const { CleanWebpackPlugin } = require('clean-webpack-plugin')
const CopyWebpackPlugin = require('copy-webpack-plugin')
const common = require('./webpack.common')
module.exports = merge(common, {
mode: 'production',
plugins: [
new CleanWebpackPlugin(),
new CopyWebpackPlugin(['public'])
]
})
在运行的时候直接 指定 --config文件就好 了
DefinePlugin
这个插件是为代码构建掺入一些全局变量,在默认状态下webpack本身就已经集成了这个插件,并且注入了一个默认的全局变量process.env.NOE_ENV这个常亮,很多第三方的库在代码中判断环境的时候就是使用了它
只需要在webpackConfig中配置就好了
const webpack = require('webpack')
module.exports = {
mode: 'none',
entry: './src/main.js',
output: {
filename: 'bundle.js'
},
plugins: [
new webpack.DefinePlugin({
// 值要求的是一个代码片段
API_BASE_URL: JSON.stringify('https://api.example.com')
})
]
}
Tree shaking
体验
这个东西就是处理构建中清理掉dead-code 冗余代码,在默认的时候prod环境下自动开启,是一个开箱即用的,它是一组功能的组合
yarn webapack --mode production简单使用和 合并模块
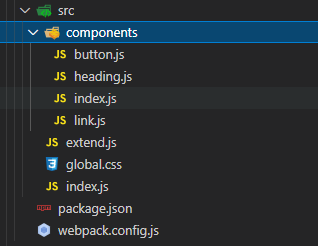
这里我自己配置一个tree shaking类似的功能
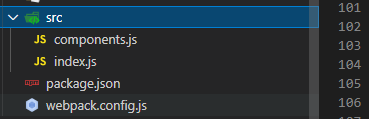
一、代码结构
export const Button = () => {
return document.createElement('button')
console.log('dead-code')
}
export const Link = () => {
return document.createElement('a')
}
export const Heading = level => {
return document.createElement('h' + level)
}
import { Button } from './components'
document.body.appendChild(Button())
{
+++
"scripts": {
    "build": "webpack"
  },
"devDependencies": {
"webpack": "^4.41.2",
"webpack-cli": "^3.3.9"
}
}
二、配置好webpack
module.exports = {
  mode: 'none',
  entry: './src/index.js',
  output: {
    filename: 'bundle.js'
  },
  optimization: {  // 这个属性是集中控制webpack的优化的配置项的
    // 模块只导出被使用的成员,用来标记
    usedExports: true,
    // 尽可能合并每一个模块到一个函数中
    concatenateModules: true,
    // 压缩输出结果  用来“摇掉”没有的东西
    // minimize: true
  }
}
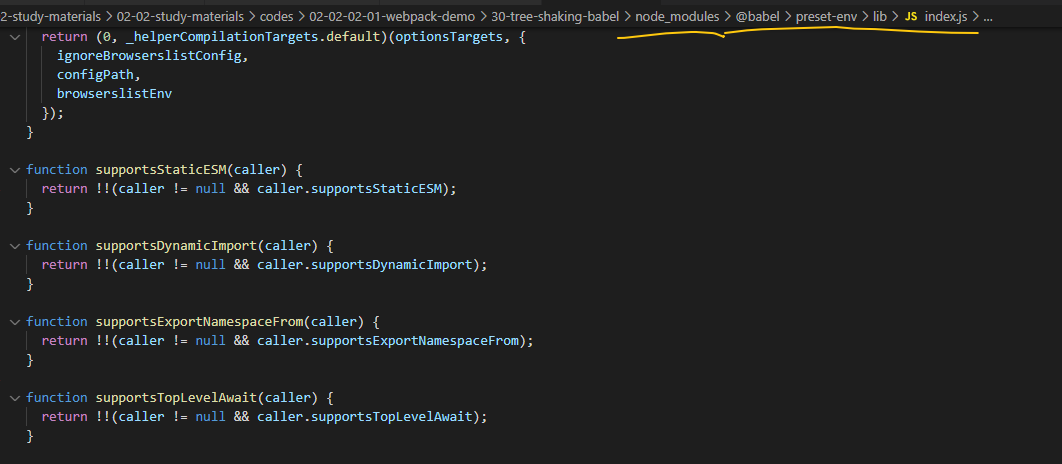
tree shanking 与babel
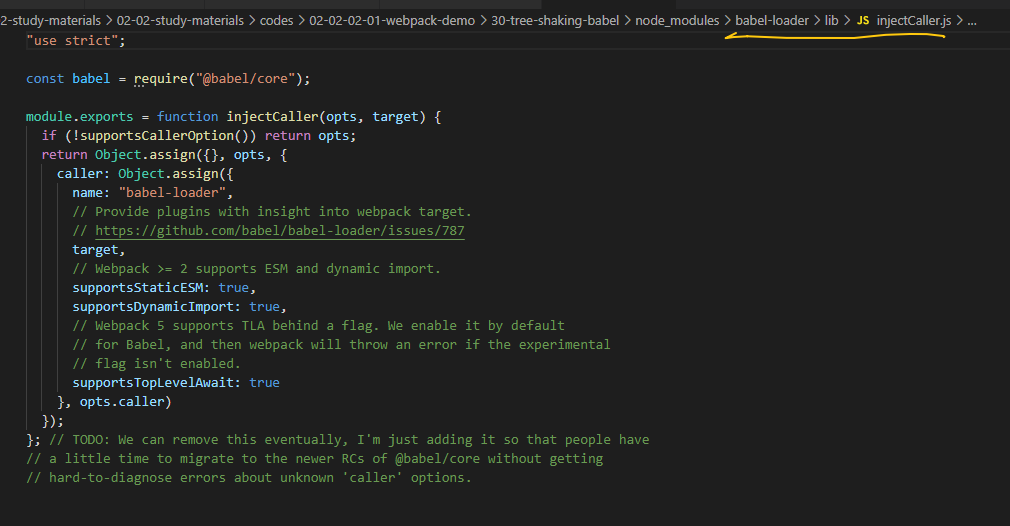
在很多资料中都有说明,tree-shanking与babel配合所使用的是有问题的,使用babel会导致tree-shankin失效,但是到底为什么会这样呢?经过测试发现
tree-shanking只支持接收ESmoudule规则的代码,而使用babel后,babel在某些环境下会把一些东西装换成commonjs规范从而导致tree-shanking失效。
在最新的webpack中的源代码中有一行配置,会默认要求babel转换成ESmodule,但是在老版本的webpack情况可能有所不同,那么老版本中如何解决呢?使用如下方式解决
module.exports = {
  mode: 'none',
  entry: './src/index.js',
  output: {
    filename: 'bundle.js'
  },
  module: {
    rules: [
      {
        test: /\.js$/,
        use: {
          loader: 'babel-loader',
          options: {
            presets: [
              // 如果 Babel 加载模块时已经转换了 ESM,则会导致 Tree Shaking 失效
              // ['@babel/preset-env', { modules: 'commonjs' }]
              // ['@babel/preset-env', { modules: false }]
              // 也可以使用默认配置,也就是 auto,这样 babel-loader 会自动关闭 ESM 转换
              ['@babel/preset-env', { modules: 'auto' }]
            ]
          }
        }
      }
    ]
  },
  optimization: {
    // 模块只导出被使用的成员
    usedExports: true,
    // 尽可能合并每一个模块到一个函数中
    // concatenateModules: true,
    // 压缩输出结果
    // minimize: true
  }
}
sideEffects
简介和注意事项
这个是webpack4的特性,一帮用于npm包标识是否有副作用
我们来设计一个 场景能够是的这个特性发挥效果
一、代码结构
# 以下的就是我们的component
# button.js
export default () => {
  return document.createElement('button')

  console.log('dead-code')
}

# level.js
export default level => {
  return document.createElement('h' + level)
}

# # link.js
export default () => {
  return document.createElement('a')
}

# extend.js
// 为 Number 的原型添加一个扩展方法
Number.prototype.pad = function (size) {
  // 将数字转为字符串 => '8'
  let result = this + ''
  // 在数字前补指定个数的 0 => '008'
  while (result.length < size) {
    result = '0' + result
  }
  return result
}


# index.js
export { default as Button } from './button'
export { default as Link } from './link'
export { default as Heading } from './heading'
然后在webpack中配置,再去json中改标记
module.exports = {
  mode: 'none',
  entry: './src/index.js',
  output: {
    filename: 'bundle.js'
  },
  module: {
    rules: [
      {
        test: /\.css$/,
        use: [
          'style-loader',
          'css-loader'
        ]
      }
    ]
  },
  optimization: {
    sideEffects: true,
    // 模块只导出被使用的成员
    // usedExports: true,
    // 尽可能合并每一个模块到一个函数中
    // concatenateModules: true,
    // 压缩输出结果
    // minimize: true,
  }
}
"sideEffects": [
    "./src/extend.js",   // 这个是有副作用的
  	"*.css"  // 这个是有副作用的 这里配置只有webpack就不会忽略它了
  ]
代码分割
说白了就是分割代码不要都堆在一个boulde中,实现它有两种方式供你选择,一个是多入口另一个是动态导入
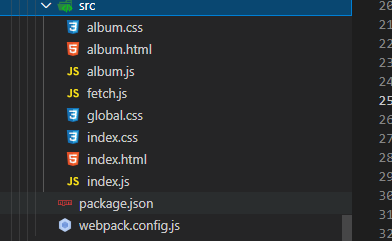
多入口打包
一般用于多页程序,公共部分统一提取
一、文件结构
二、配置webpackConfig
const { CleanWebpackPlugin } = require('clean-webpack-plugin')
const HtmlWebpackPlugin = require('html-webpack-plugin')

module.exports = {
  mode: 'none',
  entry: {
    index: './src/index.js',   // 多入口
    album: './src/album.js'
  },
  output: {
    filename: '[name].bundle.js'
  },
  module: {
    rules: [
      {
        test: /\.css$/,
        use: [
          'style-loader',
          'css-loader'
        ]
      }
    ]
  },
  plugins: [
    new CleanWebpackPlugin(),
    new HtmlWebpackPlugin({
      title: 'Multi Entry',
      template: './src/index.html',
      filename: 'index.html',
      chunks: ['index']  // chunk属性很重要
    }),
    new HtmlWebpackPlugin({
      title: 'Multi Entry',
      template: './src/album.html',
      filename: 'album.html',
      chunks: ['album']
    })
  ]
}
提起公共模块
只需要在优化配置属性中加一个属性就好了
+++
optimization: {
splitChunks: {
// 自动提取所有公共模块到单独 bundle
chunks: 'all'
}
}
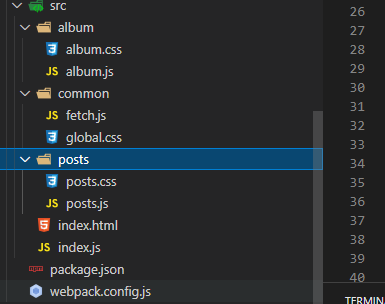
+++动态导入
可以自动按需加载,可以自动的分包
一、文件夹和场景复现
二、在使用时候IMport就好了
// import posts from './posts/posts'
// import album from './album/album'

const render = () => {
  const hash = window.location.hash || '#posts'

  const mainElement = document.querySelector('.main')

  mainElement.innerHTML = ''

  if (hash === '#posts') {
    // mainElement.appendChild(posts())
    import(/* webpackChunkName: 'components' */'./posts/posts').then(({ default: posts }) => {
      // /* webpackChunkName: 'components' */'是给chunkun命名
      mainElement.appendChild(posts())
    })
  } else if (hash === '#album') {
    // mainElement.appendChild(album())
    import(/* webpackChunkName: 'components' */'./album/album').then(({ default: album }) => {
      mainElement.appendChild(album())
    })
  }
}

render()

window.addEventListener('hashchange', render)
MiniCssExtractPlugin
它可以实现css的动态引入
const { CleanWebpackPlugin } = require('clean-webpack-plugin')
const HtmlWebpackPlugin = require('html-webpack-plugin')
const MiniCssExtractPlugin = require('mini-css-extract-plugin')
const OptimizeCssAssetsWebpackPlugin = require('optimize-css-assets-webpack-plugin')
const TerserWebpackPlugin = require('terser-webpack-plugin')

module.exports = {
  mode: 'none',
  entry: {
    main: './src/index.js'
  },
  output: {
    filename: '[name].bundle.js'
  },
  optimization: {
    minimizer: [
      new TerserWebpackPlugin(),
      new OptimizeCssAssetsWebpackPlugin()
    ]
  },
  module: {
    rules: [
      {
        test: /\.css$/,
        use: [
          // 'style-loader', // 将样式通过 style 标签注入
          MiniCssExtractPlugin.loader,  // link标签方式注入
          'css-loader'
        ]
      }
    ]
  },
  plugins: [
    new CleanWebpackPlugin(),
    new HtmlWebpackPlugin({
      title: 'Dynamic import',
      template: './src/index.html',
      filename: 'index.html'
    }),
    new MiniCssExtractPlugin()  // 使用这个就是提取的css的插件
  ]
}
OptimizCssAssetsWebpackPlugin
这个是给提取出来的样式进行一次压缩
const { CleanWebpackPlugin } = require('clean-webpack-plugin')
const HtmlWebpackPlugin = require('html-webpack-plugin')
const MiniCssExtractPlugin = require('mini-css-extract-plugin')
const OptimizeCssAssetsWebpackPlugin = require('optimize-css-assets-webpack-plugin')
const TerserWebpackPlugin = require('terser-webpack-plugin')

module.exports = {
  mode: 'none',
  entry: {
    main: './src/index.js'
  },
  output: {
    filename: '[name]-[contenthash:8].bundle.js'
  },
  optimization: {
    minimizer: [
      // webpack建议我们放在minimizer中 这样可以统一控制
      new TerserWebpackPlugin(),  // 压缩js的,为什么要加这个 webpack本身就自带,因为你使用了minimizer那么webpack把默认的js压缩给去掉了,认为你是要自定义压缩,所以只好自己加一个进来了
      new OptimizeCssAssetsWebpackPlugin()  // 压缩css模块的
    ]
  },
  module: {
    rules: [
      {
        test: /\.css$/,
        use: [
          // 'style-loader', // 将样式通过 style 标签注入
          MiniCssExtractPlugin.loader,
          'css-loader'
        ]
      }
    ]
  },
  plugins: [
    new CleanWebpackPlugin(),
    new HtmlWebpackPlugin({
      title: 'Dynamic import',
      template: './src/index.html',
      filename: 'index.html'
    }),
    new MiniCssExtractPlugin({
      filename: '[name]-[contenthash:8].bundle.css'
    })
  ]
}
出文件名Hash
前提知识:客户端在请求我们的服务器的时候,由于一些优化策略会缓存一些文件,通过hash我们可以动态的修改打包文件,让客户端能够请求到最新的文件
hash在webpack中有三种hash
[hash]  // 全项目级别的
[chunkhash]  // chunk级别的,同一路的chunk是不会变化的
[contenthash]   // 根据不同的文件生成不同的hash,这个最适合解决缓存问题了!
[contenthash:8]指定hash的长度 8