OPENAPI是什么
OpenAPI 规范是一种与语言无关的定义格式,用于描述 RESTful API;中文文档 https://openapi.apifox.cn/ ,原英文 https://www.openapis.org/ 文档
简单使用
yarn add @nestjs/swagger然后套用下面的这样的样板代码就能初步实现 swagger doc 了
~ main.ts
+++
const config = new DocumentBuilder()
    .setTitle('Cats example')
    .setDescription('The cats API description')
    .setVersion('1.0')
    .addTag('cats')
    .build();
  const document = SwaggerModule.createDocument(app, config);
  SwaggerModule.setup('api', app, document);
+++
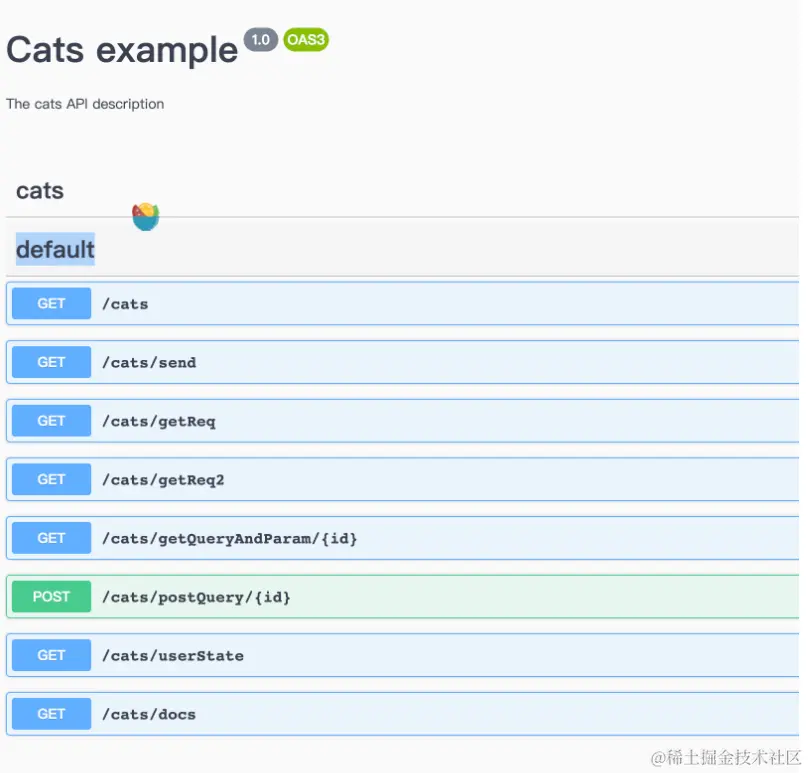
这个时候你访问/api 就能看到 swagger 文档了
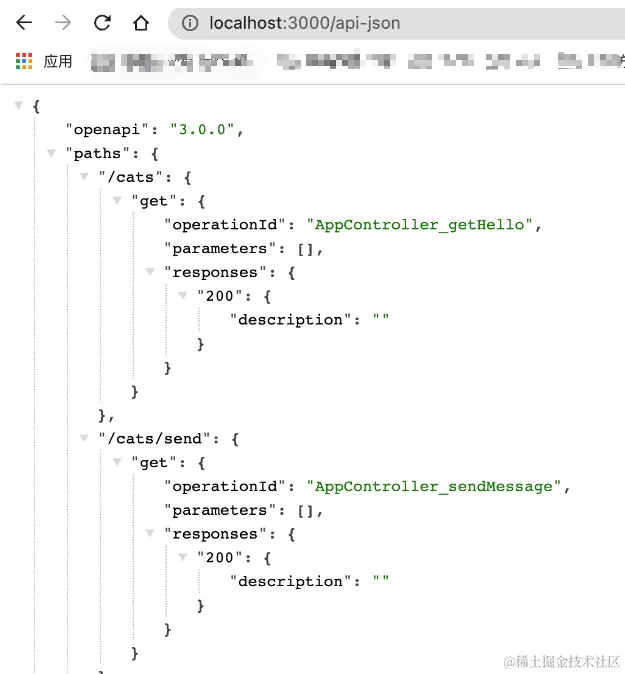
 如果你需要 访问JSON 请加一个后缀 -json

特别注意 关于CSP你需要重新调整一下, 关于CSP是什么 和下面的代码到底在干什么 请去参阅我之前的文章
app.register(helmet, {
  contentSecurityPolicy: {
    directives: {
      defaultSrc: [`'self'`],
      styleSrc: [`'self'`, `'unsafe-inline'`],
      imgSrc: [`'self'`, 'data:', 'validator.swagger.io'],
      scriptSrc: [`'self'`, `https: 'unsafe-inline'`],
    },
  },
});

// If you are not going to use CSP at all, you can use this:
app.register(helmet, {
  contentSecurityPolicy: false,
});
关于详细的API参数
DocumentBuilder , 详情请观察 其 ts类型定义
createDocument , 详情请观察 其 ts类型定义
Types and parameters
我们可以给API 设置各种各样的参数和类型说明(DTO), 由于类型比较多我们一一说明
关于 body 和 query 和 param 都可以做声明 方式如下
import { ApiProperty } from '@nestjs/swagger';
export class CreateCatDto {
  @ApiProperty()
  name: string;

  @ApiProperty()
  age: number;

  @ApiProperty()
  breed: string;
}

+++
  @Post('create')
  createUser(@Body() createCatDto: CreateCatDto ){
  // @Query @Parmas 是同样的道理的,而且他们和 Mysql的Entity, Mongoose 的Entity 不互斥,和其它的装饰器工具比如 fillter Serialization 也不互斥
    return 'ok'
  }
关于 ApiProperty 的各种场景 说明
一定要明确一点 这上面的类型 并不是ts类型 而是String构造器 ,因为ts中的类型相关属性 不存储有关泛型或接口的元数据
比如下面的
// 如果你希望这样用 那么它会失败 你得这样声明
createBulk(@Body() usersDto: CreateUserDto[])

  @Post('create')
  @ApiBody({type: [CreateCatDto] }) // 注意它不是类型 而是一个class
  createUser(@Body() createCatDto: CreateCatDto[] ){

    return 'ok'
  }
以下 是各种常见场景的具体说明
import { ApiProperty, ApiPropertyOptional } from '@nestjs/swagger';
import { types } from 'util';

export enum UserRole {
  Admin = 'Admin',
  Moderator = 'Moderator',
  User = 'User',
}

class NodeBranch {
  @ApiProperty({
    type: String
  })
  name:string

  @ApiProperty({
    type: Number
  })
  id:number
}

export class CreateCatDto {
  @ApiProperty()
  name: string;

  @ApiProperty({
    default:1,
    description:"age",
    minimum:1,
    type:Number,
    required:true
  })
  age: number;

  @ApiProperty({
    type: [String]
  })
  breed: string[];

  // 如果有循环依赖 请使用
  @ApiProperty({
    type: () => NodeBranch
  })
  nodeBranch: NodeBranch;

  // 两种方式使用 enum
  // @ApiProperty({
  //   enum:['Admin','Moderator','User']
  // })
  // role: string

  @ApiProperty({
    enum:UserRole
  })
  role: UserRole
}
特殊说明,如果你是使用到query/parma上 请按下面的使用
 // 设置为true 的时候表示可以多选 ,但...url将会是 /findUserByRole?role=Moderator&role=User
  @ApiQuery({ name: 'role', enum: UserRole, isArray:false })
  @Get('findUserByRole')
  filterByRole(@Query('role') role: UserRole = UserRole.User) {
    log('role',role)// Array 类型 会随着装饰器上 isArray 变化而变化
  }
有的时候 我们会需要手动写type 而不是写在dto里 (不推荐)
  // 有的时候 我们会需要手动写type 而不是写在dto里 (不推荐)
  @ApiBody({
    schema: {
      type: 'array',
      items: {
        type: 'array',
        items: {
          type: 'number',
        },
      },
    },
  })
  @Post('t2')
  async create(@Body() coords: number[][]) {}
我们说说 “有的时候你发现有时候并没有用这个DTO但是由于些原因它就自己被swagger引入了” 这个时候你需要排除,请使用它
// 可以用到全局/ controller 上
@ApiExtraModels(ExtraModel)
export class CreateCatDto {}

const document = SwaggerModule.createDocument(app, options, {
  extraModels: [ExtraModel],
});
还有一种场景,我既可以又可以的情况下
export class Cat {
  @ApiProperty()
  catName:string
}

export class Dog {
  @ApiProperty()
  dogName:string
}

export class BigTypeDto {
  @ApiProperty({
    oneOf:[ // 关于这个 请看这里的文档  https://swagger.io/docs/specification/data-models/oneof-anyof-allof-not/
      { $ref: getSchemaPath(Cat) },
      { $ref: getSchemaPath(Dog) },
    ]
  })
  pet:Cat | Dog
}

export type Pet = Cat | Dog;

@ApiExtraModels(Cat, Dog) // 一定要加
export class AppController {
  @Post('t3')
  t2(@Body() bigTypeDto: BigTypeDto ){}

  // 如果是array还是一样的操作
  @ApiProperty({
    type: 'array',
    items: {
      oneOf: [
        { $ref: getSchemaPath(Cat) },
        { $ref: getSchemaPath(Dog) },
      ],
    },
  })
  pets: Pet[];
  }
关于操作
先了解一个概念和术语 在Open API 规范中 路径是资源,操作是用于操作这些路径的 HTTP 方法、
所有的操作
- @ApiTags
这几个可以加到 具体router上也可以加到controller上
  @ApiTags('6')
  @Post('t3')
t2(@Body() bigTypeDto: BigTypeDto ){}- @ApiHeader
  @ApiHeader({
    name: 'X-MyHeader',
    description: 'Custom header',
  })
t2(@Body() bigTypeDto: BigTypeDto ){}- @ApiRespose
  @Post()
  @ApiResponse({ status: 201, description: 'The record has been successfully created.'})
  @ApiResponse({ status: 403, description: 'Forbidden.'})
  async create(@Body() createCatDto: CreateCatDto) {
    this.catsService.create(createCatDto);
  }
针对 ApiResponse Nest提供一组 简化的 装饰器
- @ApiOkResponse()
- @ApiCreatedResponse()
- @ApiAcceptedResponse()
- @ApiNoContentResponse()
- @ApiMovedPermanentlyResponse()
- @ApiFoundResponse()
- @ApiBadRequestResponse()
- @ApiUnauthorizedResponse()
- @ApiNotFoundResponse()
- @ApiForbiddenResponse()
- @ApiMethodNotAllowedResponse()
- @ApiNotAcceptableResponse()
- @ApiRequestTimeoutResponse()
- @ApiConflictResponse()
- @ApiPreconditionFailedResponse()
- @ApiTooManyRequestsResponse()
- @ApiGoneResponse()
- @ApiPayloadTooLargeResponse()
- @ApiUnsupportedMediaTypeResponse()
- @ApiUnprocessableEntityResponse()
- @ApiInternalServerErrorResponse()
- @ApiNotImplementedResponse()
- @ApiBadGatewayResponse()
- @ApiServiceUnavailableResponse()
- @ApiGatewayTimeoutResponse()
- @ApiDefaultResponse()
使用起来就像这样
  @Post()
  @ApiCreatedResponse({
    description: 'The record has been successfully created.',
    type Cat // 注意这个必须是一个class 而不是ts中的类型
    })
  @ApiForbiddenResponse({ description: 'Forbidden.'})
  async create(@Body() createCatDto: CreateCatDto) {
    this.catsService.create(createCatDto);
  }
关于文件上传的特殊说明
class FileUploadDto {
  @ApiProperty({ type: 'string', format: 'binary' })
  file: any;
}

  @UseInterceptors(FileInterceptor('file'))
  @ApiConsumes('multipart/form-data')
  @ApiBody({
    description: 'List of cats',
    type: FileUploadDto,
  })
  uploadFile(@UploadedFile() file) {}

// 若是多个file 请使用
class FilesUploadDto {
  @ApiProperty({ type: 'array', items: { type: 'string', format: 'binary' } })
  files: any[];
}
高级骚操作
我们来看看如果遇到这样需求 我们如何处理
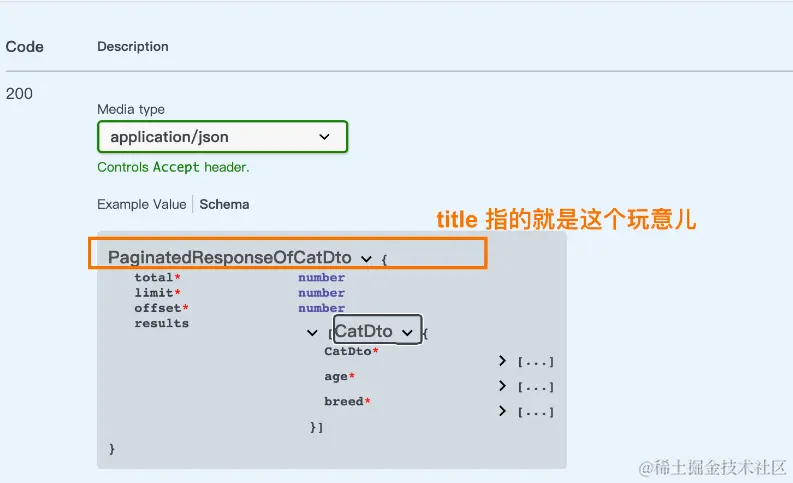
我们现在需要一个通用分分页功能,需要在swagger上 做到符合OPENAPI规范,又可以重复使用 ,不需要写过多的 代码。
- 我们从ts 出发 一开始 就可以这样做
// 注意class 也是可以接受泛型的
export class PaginatedDto<TData> {
  @ApiProperty()
  total: number;

  @ApiProperty()
  limit: number;

  @ApiProperty()
  offset: number;

  results: TData[];
}


export class CatDto {
  @ApiProperty()
  name: string;

  @ApiProperty()
  age: number;

  @ApiProperty()
  breed: string;
}

// 然后我们去尝试用一下
@ApiExtraModels(PaginatedDto,CatDto)
@Controller("cats")
export class AppController {
 @ApiOkResponse({
    schema: {
      allOf: [ //allOf 是 OAS 3 提供的概念,用于涵盖各种与继承相关的用例。
        { $ref: getSchemaPath(PaginatedDto) },
        // 由于你并没有直接绑定 PaginatedDto 所以你需要把这个 model加到 ApiExtraModels 中去
        {
          properties: {
            results: {
              type: 'array',
              items: { $ref: getSchemaPath(CatDto) },
            },
          },
        },
      ],
    },
  })
  @Get('t4')
  async ts4(): Promise<PaginatedDto<CatDto>> {
    return Promise.resolve({
      limit:10,
      total:1,
      offset:1,
      results:[{
        name:'6',
        age:2,
        breed:'6666'
      }]
    })
  }
}- 这样虽然可以做到,但是过于啰嗦 我们能不呢再抽象一下
我们可以使用装饰器的方式把它抽象出去
export const ApiPaginatedResponse = <TModel extends Type<any>>(
  model: TModel,
) => {
  return applyDecorators(
    ApiOkResponse({
      schema: {
        title: `PaginatedResponseOf${model.name}`
        allOf: [
          { $ref: getSchemaPath(PaginatedDto) },
          {
            properties: {
              results: {
                type: 'array',
                items: { $ref: getSchemaPath(model) },
              },
            },
          },
        ],
      },
    }),
  );
};

// 这样使用起来就很简单了
 @ApiPaginatedResponse(CatDto)
  @Get('t5')
  async ts5(): Promise<PaginatedDto<CatDto>> {
    return this.genrateCatDto()
  }
关于类型映射
诶 我们前面的内容有讲到这样的一个要点 swarger 上用的并非 ts的类型,而是增强之后的class,那么我们如何做 ts 的一些常见类型编程操作呢? 比如 Partial Omit,Pick... 这个时候就需要使用类型mapping 了
// 实际上使用也很简单 ,就是把增强后的class 以某种方式 修改掉

// 注意 PartialType 从@nestjs/swagger 来!而是TS 的PartialType
export class UpdateCatDto extends PartialType(CreateCatDto) {}

// 类似的 Omit,Pick 也都有 IntersectionType(合并) 也有 使用方式类似这里就不多说了
关于安全机制
有的时候我们API需要token ,而且有时候不仅仅需要token 还需要其他的玩意儿,这种时候如何做呢? 请查阅下文
若要定义应将哪些安全机制用于特定操作 在程序运行之前我们就需要加入 验证方式
~ main.js
const config = new DocumentBuilder()
    .setTitle('Cats example')
    .setDescription('The cats API description')
    .setVersion('1.0')
    .addTag('cats')
    .addSecurity('basic',{
      type:'http',
      scheme:'basic'
    })
    .build();

// 然后我们开启安全检测
  @ApiSecurity('basic')
  @ApiPaginatedResponse(CatDto)
  @Get('t5')
  async ts5(): Promise<PaginatedDto<CatDto>> {
    return this.genrateCatDto()
  }
然后我们基于 basic 进行验证
~ main

const options = new DocumentBuilder().addBasicAuth();

// 如果这个API需要那么久+上
  @ApiSecurity('basic')
  @ApiBasicAuth()
  @ApiPaginatedResponse(CatDto)
  @Get('t5')
  async ts5(): Promise<PaginatedDto<CatDto>> {
    return this.genrateCatDto()
  }
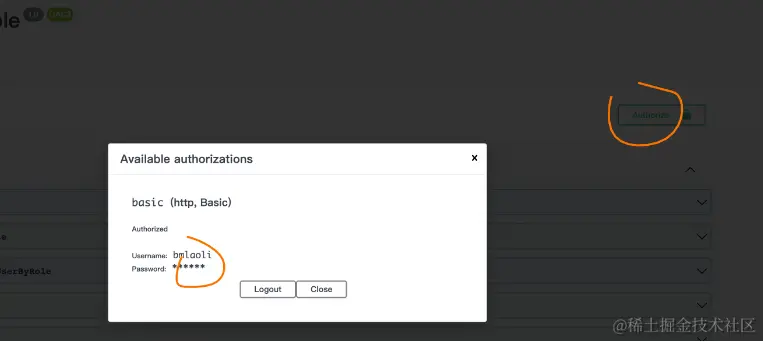
使用的时候我们只需要登陆一下 就好了,传输过程中,会在header上携带一个 Authorization: Basic Ym1sYW9saTphYWFhYQ== 它是被base64 加密之后的 name 和password 进行传输的
具体的验证需要自己去实现。
如果要基于Bearer 或者 OAuth2,或者Cookie 也是差不多的 请看文档 https://docs.nestjs.com/openapi/security
结束语
到目前为止我们的Nest相关的所有内容,到这里就结束了,已经涵盖了所有的官方文档的内容和具体的实践,以及踩坑。接下来请同学们运用到自己的实际生产中去吧,如果有任何问题 请在文章评论处留言,我会一一回复